CBJ Union City Plumbers
  • Home
  • Services
    • Boiler Repair
    • Drain and Sewer Clearing
    • Faucet and Fixtures Replacement
    • Furnace Installation & Replacement
    • Furnace Service & Maintenance
    • Heat Pump Service & Maintenance
    • Humidity Control & Dehumidification
    • New Bathroom Finish
    • New Bathrooms Prep
    • New Hot Water Heater
    • Replace Boiler
    • Small Plumbing Repairs
  • About Us
  • Contact Us
  • CBJ Plumbers West New York
  • Blog

Blogs

How to Use a Plumber's Snake to Snake a Drain

10/28/2022

1 Comment

 
If you're dealing with a clog that's too tenacious for a plunger but you aren't quite ready to give up just yet, a manual drain snake might be your best option. A drain auger, often known as a plumber's snake, is a tool that "snakes" it's way through pipes to clear obstructions. The method of "snaking" a pipe is a compromise between the more extreme methods of "plugging" and "bringing in the heavy guns," such as professional, powered drain augers.

The plumber's snake is a DIY drain-clearing tool that is more effective than using a plunger, but it is also more difficult to operate. They might be challenging to maneuver through tight turns and twists because of their size. Learn the ins and outs of how your snake operates so that you can avoid making mistakes that will cost you money. Everything you need to know about using a drain snake is provided here for your convenience.

How to operate a plumbing snake, as well as an explanation of what an auger actually is.
​

Simply put, an auger is a tool that is designed to bore into various materials. One type of auger is known as a drill. A plumbing auger, also known as a plumbing snake, is a long, flexible metal cable that, at one end, features a small, uncoiled spring and, at the other end, features a handle. The snake's auger head has a distinct resemblance to a corkscrew. An auger used in residential plumbing is typically between 20 and 50 feet in length. When it's not being used, the cable can be wound into a tight cylinder and stored away. The vast majority of plumbing snakes for the home are operated manually and feature a handle or crank that can be turned to both releases and manipulate the cable. You can navigate through difficult terrain by rotating the coil by turning the handle, which is located on the side of the device.

Entering a drain directly to make direct physical contact with the obstruction that is causing the clog and then removing it is what is meant by "snaking" a drain. You begin by placing the head of the auger into the drain, and then you manually feed the snake forward into the drain until you reach the obstruction. As the snake unwinds, it makes it's way further into the drainpipe, and eventually, the head of the snake makes its way past the blockage. The following is a more in-depth explanation of how to use a drain auger:

How to Use a Drain Snake: ​

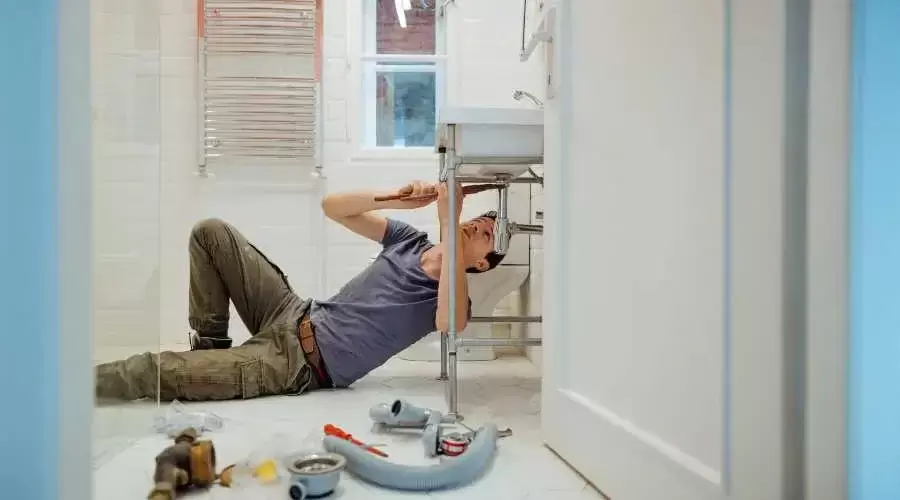
1. The first step in learning how to use a drain snake is to put on some clothing that you don't mind getting messed up and to lay some old towels down below the pipes that you will be working on. It is possible for your snaking process to become nasty depending on the type of clog you are attempting to remove. If you wind up eliminating the p-trap, this becomes a very essential consideration.

2. (Optional but recommended) (Optional but recommended) Think about getting rid of the p-trap. The curved section of pipe that can be found below the sink is known as the p-trap. It is the conduit that links the drain in the sink to the larger drainpipe network in your home. It was designed to be bent in this way so that sewage gases would not be able to travel up through the sink and into the house. P-traps are typically manufactured using PVC pipe; however, they can also be manufactured using metal.

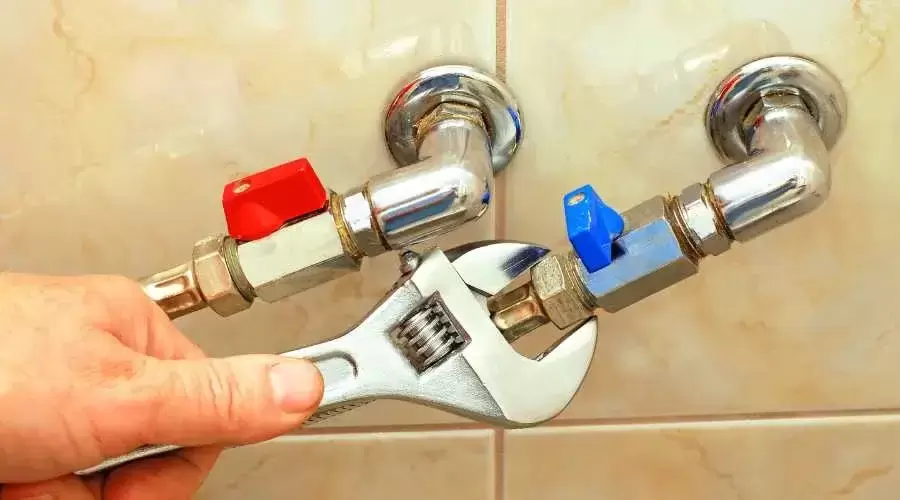
It is possible to remove the p-trap by hand, either by using your hands or by employing the assistance of an adjustable wrench. After removing the P-trap, you should give it a careful inspection and make sure that it is clean inside. If you've identified the cause of the obstruction, you might not need to use the snake at all. By removing the trap, the tough twist can often be avoided, which makes the process of snaking easier.

3. You might want to remove the trap arm, but this step is optional. The section of the pipe that is between the p-trap and the main wall pipe is referred to as the trap arm. It maintains the position of the p-trap and may curve once more before it reaches the wall. Search for a nut, either made of metal or plastic, that connects the trap arm to the wall. Turn the nut counterclockwise to release the trap arm, if you can find one. In the event that you are unable to, it is possible that the arm is bonded in place; in such a scenario, you should not attempt to remove it. Once you have removed the trap arm, you need to make sure that you clean it out just like you would the p-trap.
­
By removing the trap arm, you will have the greatest amount of access to the drainpipe that is possible. Check the inside of the drainpipe for any obstacles that could be there. If you are able to see the obstruction, you should attempt to remove it from where you are currently standing. When all else fails, it's time to bring out the snake.
­
4. Insert the snake's auger head into the pipe using the manual threading method. Put the head of the snake into the drain (if you didn't remove the trap beforehand), or the access point on the wall, whichever is appropriate. In the event that the trap wasn't removed, you might want to consider running cold water while you snake.
­
If you thrust the auger into the drain with too much force, you could end up damaging the drain entry or the tubing leading to the drain. Be patient and check to see that the snake's head and cable are not excessively large for the drain that you are attempting to snake.

5. Using the snake itself, start the process of uncoiling the snake. Maintain as close a distance as feasible between the entrance of the pipe and the handle of the snake. When there is less slack in the auger, you are able to direct a greater amount of force into the pipe.
Continue to slowly and steadily feed the line. It is possible that you have come across the blockage or merely a bend in the pipe if you experience any resistance at any time when the cable is moving through the pipe.

6. When you have reached the obstruction, continue to press while rotating the handle to move the head back and forth. You should make an effort to remove the obstruction or go around the corner, but you shouldn't force the auger into the pipe's walls. If you hear scraping noises, you need to stop what you're doing and readjust the snake. It may be helpful to make consistent push and pull actions when spinning the crank.

7. Remove the snake from the drain and then reassemble the various parts of the sink. Make sure there are no remnants of the obstruction on the auger head, and then clean it. If you had previously removed the trap arm and the p-trap, then you need to put them back in place at this stage.

8. Make sure the sink works. The obstruction ought to have been successfully removed by the snake, which should have resolved the clogging issue. You can try to repeat the process of snaking if there is still a clog after you have tried everything else. However, similar to plunging, excessive use of a drain snake can cause damage to the pipes and drains in your home. If a careful snake through didn't fix the issue, it could be time to bring in the experts.

Professional Drain Cleaning Services in Union City
​

Snaking is a surprisingly simple and approachable do-it-yourself job for homeowners. You should be able to remove annoying clogs from your sink, bathtub, or toilet as long as you are familiar with how to operate your snake and have the patience to manipulate your snake.

Because there are going to be moments when you just can't get through that clog no matter what you do. Don't despair! Following the removal of your snake, the next step is to get in touch with CBJ Plumbing Union City NJ. Outside of the Union City area, we can locate and clear any kind of traffic jam thanks to the expertise and equipment at our disposal.
1 Comment

A Step-by-Step Guide on How to Increase the Effectiveness of Your Water Heater

10/21/2022

0 Comments

 
Did you realize that simply heating up your water accounts for over twenty percent of the total energy cost for your home? The consumption of more energy is required for the process of heating water than practically any other domestic activity (except for heating and cooling your whole home.) If your water heater's efficiency is less than fantastic, the hefty prices you already face will hit you even harder than they would have otherwise.

Water heaters that are not energy efficient do not operate as well as they could and cause you to spend more money on a monthly basis. It's a no-win situation that has the potential to become much drier over time. The efficiency of your water heater may be improved with a number of tried and tested techniques, which is fortunate. Here are five easy DIY projects that can improve the efficiency of your water heater and save you money in the process.

Step 1: Drain Water Heater Sediment

Magnesium and calcium are two examples of minerals that might accumulate in the tank of your water heater over time. These minerals will eventually fall to the bottom of the tank, where they will become cemented and form silt. The settling of sediment in your tank might make the system work harder than it has to in order to heat the water, which is inefficient. Over time, the additional labor causes the tank to experience a buildup of pressure, which leads to overheating and possibly even ruptures. At the very least once every year, and perhaps up to three times if you have hard water, you should completely drain your water heater tank and rinse it out with cold water. This will ensure that your water heater is operating at peak efficiency.

When sediments are removed, your heater will operate much more efficiently, and you will avoid the more expensive repairs that can arise as a result of the buildup that sediments can cause. If you have the correct equipment, flushing your water heater is a fairly straightforward chore that you should be able to complete on your own. You also have the option of calling in a professional to perform this task as part of a broader call for water heater repair.

Step 2: To insulate the water pipes

Heat has a rapid dissipation rate, and this is especially true in your plumbing and water tank. Even though this is a natural occurrence, it hinders the ability of your water heater to heat water as effectively as it could. It is necessary to heat a greater quantity of water in order to compensate for the heat that is lost in the pipes of your home. When you heat more water, your water heater will have to run for longer periods of time, at a higher level of intensity, and will use more electricity. This results in an increase in the amount of money spent on your power bill. Insulating water pipes is an effective way to reduce heat loss and increase operational efficiency.

When you insulate your pipes, the heat generated by the system is contained within it, where it should be. Insulated water pipes retain heat for extended periods of time and even have the ability to boost the water temperature by 2-4 degrees Fahrenheit on their own. Even something as simple as insulating your cold water pipes can make a difference.

If you do a little bit of research beforehand, the task of insulating your pipes and water heater will not be too difficult for you. Simply choose an insulation material, take the necessary measurements of your pipes, and get started using some equipment that is already in your home, including gloves, scissors, a tape measure, and duct tape.

Step 3: Install Fixtures with a Low Flow Rate
​

Installing plumbing fixtures with a low water flow rate is one more simple step that can help you save money over the long term without requiring a significant amount of time or work initially. The water flow rate (in gallons per minute) is decreased by low-flow fixtures, which perform exactly what their name implies they will do. This results in less of your valuable hot water being wasted unnecessarily down the drain.

Consider switching out high-flow fixtures in your home, such as shower heads, faucets, and even toilets, with low-flow models that use up to half as much water. This will result in significant reductions in your monthly utility bills. They require an initial investment of a little more cash, but in the long term, they will save you a substantial amount of cash, which is especially beneficial if you have a family member who is renowned for taking long, hot showers.

Step 4: Set your Water Heater to 120 Degrees Fahrenheit
​

The fact that a thermostat is pre-installed in every water heater is something that many homeowners are unaware of. This thermostat tells the system how much heat it needs to apply in order to bring the water in the tank to the desired temperature. The higher the temperature at which your system heats the water, the longer it operates and the greater the total amount of energy that is consumed. You should check the setting on the thermostat of your water heater if the temperature of your hot water seems to be dangerously high or if it heats up extremely quickly. Turning down the thermostat on your water heater will assist to maintain the quality of your drinking water while also reducing the cost of your utility bills.

The majority of manufacturers will preset water heaters to a temperature of 140 degrees Fahrenheit as the default setting. In point of fact, it is not safe to wash oneself or take a bath in water with temperatures higher than 120 degrees. Even though most industry professionals will agree that a temperature of fewer than 120 degrees creates an environment in which bacteria can grow in the water that has settled in the tank, you should still take care to ensure that you do not set the temperature of your water heater any lower than that. You can use this tutorial to save between three and five percent every year on your annual water bill by following the steps on how to manually lower the temperature on your water heater at home by yourself.

Step 5: Fix any Leaks in the Plumbing

Leaks in the plumbing are much more prevalent than you might believe. In addition to this, you may not realize the extent to which they impact the structure of your home. Even the smallest leakage from a faucet can waste 1,661 gallons of water per year, which can add $35 to your water bill. The amount of water that is being wasted also has an effect on your water heater. The more hot water that escapes from your pipes into the surrounding environment, the more work your water heater needs to do. This indicates that it is operating for a longer period of time, which results in greater consumption of energy. The fact that your water heater is continuously operating because it needs to make up for lost hot water is the most typical sign that there is a leak in your plumbing system. How then can you detect leaks in your water system before they empty your water tank and your wallet?

The water heater itself is frequently the source of leaks that compromise your home's water supply. To begin, check the area around the tank of your water heater for any obvious signs of leaks. Both the temperature-pressure relief valve and the drain valve are strong candidates for the origin of the leak. It's possible that the temperature-pressure relief valve is broken, in which case it will leak instead of releasing pressure (as it was designed to do). You should also inspect the water pipes themselves, paying particular attention to those that are located close to fixtures such as sinks and showers. Keep in mind that there is no such thing as a "little leak" that can be ignored. Call your local plumber for assistance if you need help repairing plumbing problems or locating probable leaks in the plumbing.

Maintain your water heater by performing routine maintenance on it

It is simple to forget about your water heater, particularly when there does not (seems to be) anything wrong with it. We strongly advise you to ensure that your heater is as energy-efficient and well-maintained as is humanly possible, even if there are no leaks or other obvious causes for concern. It will help you save money on your water bill right now, and it will also help extend the overall life expectancy of your water heater.

If you need assistance ensuring that your water heater is working as well as it should, or if you would like to replace or repair your water heater, contact the plumbing experts at CBJ Plumbing Union City NJ as soon as possible to make a service appointment. If there is anything we can do to make you feel more at ease in your own home and save you money in the long term, we will do it without hesitation.
0 Comments

What Caused My Sewer Line to Become Clogged?

10/14/2022

1 Comment

 
The most significant issue that could arise with your plumbing system is most likely a clog in the main sewer line. Because there is nowhere for the wastewater to go, your entire plumbing system is effectively rendered inoperable if the sewer drain becomes clogged. The key to everything is in removing that obstruction. Even the most frightening plumbing situations are less likely to include human waste if they can be avoided. We are sorry to be the ones to break this to you, but unfortunately, yes, this does happen on occasion.

To our great relief, the majority of potentially disastrous plumbing issues can be avoided with a minimum of effort. Taking a few fundamental precautions is the most effective approach to prevent sewage from backing up into your home. If you have a sewer drain pipe that doesn't seem to be draining properly, it's probably due to one of the following three issues:

Tree Roots in Sewer Line

This is of particular importance for people who live in California, such as ourselves. In order to thrive, trees require moisture. In the event that they have less access to moisture than usual (for example, as a result of a drought), they will begin searching for water anyplace they can find it, including in your sewer system. Root tendrils as thin as human hair can squeeze through the tiniest holes or pipe fittings in your sewer drain pipe and eventually cause a lot of damage.

You shouldn't consider yourself to be in the clear simply because you don't have a large number of trees in your yard. Roots can extend to great distances. It's entirely possible that the root systems of the trees in your neighbor's yard were to blame for the sewage backup in your home. Cleaning and inspecting your sewer and drains on a regular basis are the two easiest things you can do to protect your property from damage caused by tree roots.

Sewer Clog

This is by far the most prevalent reason for sewage to back up into homes. Unfortunately, people will try to flush everything and everything down the toilet, even if it doesn't belong there. You name it: paper towels, oil, a beloved goldfish that has passed away. The problem is that when you flush stuff down your toilet that your pipes are not designed to handle, your pipes start to become clogged.

If you only see a clog in a single fixture, this indicates that the obstruction is most likely contained in a single group of pipes. That is encouraging news! If you see sewage backing up in fixtures located throughout your home or near your home's cleanout for the sewer, the clog is likely located in your main sewer line. That is a significant issue, and in order to solve it, you will require the assistance of a specialist. Be careful about what you flush down the toilet in order to avoid creating clogs like these in the first place. Never pour hot grease down a drain, and only use your garbage disposal when it's absolutely necessary.

A Sewer Line That Is Damaged Or Has Collapsed

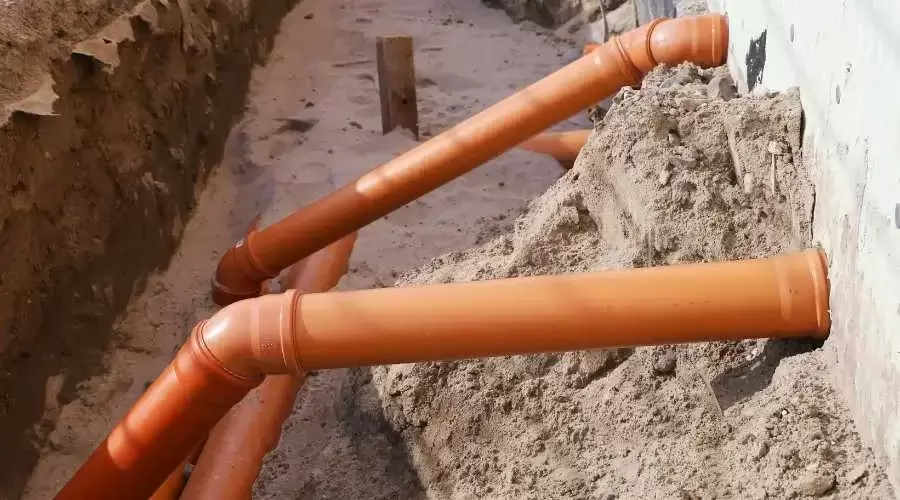
There is nothing that will last forever, and that includes the sewer line in your home. Depending on how old your house is, the sewage line may have collapsed under the pressure of the earth piled on top of it, or it may have been built using materials that are no longer in use. Or a mix of the two of them together. While the majority of sewer lines in use today are constructed from long-lasting and heavy-duty plastic materials, this wasn't always the case in the past.

Pipes in older dwellings are typically made of either cast iron or clay. Over time, these materials could deteriorate and wear away to the point where they crack or even fall apart completely. When a collapse occurs in a sewer system, the sewage that is being processed cannot be directed anyplace else; as a result, it builds up. If you are concerned about the quality of your sewer line, you can have a skilled plumber perform a camera inspection of your pipes to see how they are currently functioning.

Cleaning and Maintenance of the Union City Sewer System

Contact CBJ Plumbing Union City NJ if you are experiencing plumbing problems in your house that may be caused by a clogged sewer. Whatever it is that you require for your sewer line, we can provide it. Even if it seems revolting, that's exactly why we're here to help.
1 Comment

4 Reasons Your Toilet Takes a Long Time to Fill

9/22/2022

0 Comments

 
Does it take too long for your toilet to fill with water after you flush it? This is a common problem in homes. This problem may have been caused by more than one thing. Even though none of them are very serious or expensive to fix, knowing what the problem is may help you choose the right solution so that your toilet works as well as it can again.

Why Does Your Toilet Take So Long To Fill?
​

If your toilet takes a long time to fill, it could be because of one of four things: a clogged vent, a clogged drain, malfunctioning plumbing, or a blocked pipe.
1. A vent that is clogged. If your vent is blocked, air won't be able to leave the tank, and it will take longer for the tank to fill with water. If you want to see if your vent is blocked, take the cover off the roof and look. If leaves or other things are blocking it, clean it out and see if that fixes the problem.
2. A plugged drain. For your toilet to work right, the drain in the bottom of the tank also needs to be clear. You could try plunging this out with a little vinegar and baking soda.
3. Faulty plumbing. If your vent or drain are fine, you might want to look for leaks in your plumbing. If a pipe is leaking, your toilet will take longer to fill than it should.
4. Pipe clogged. Your toilet will also fill slowly if there is something in the way of the water going into the tank. This is usually a piece of paper or a toy.

How do I fix a toilet that fills slowly?
​

Once you figure out why your toilet is taking a long time to fill, it's usually easy to fix. If a vent, drain, or pipe is clogged, you can clear it yourself. If the problem is with the plumbing, you might need to call a professional to look at it. In any case, here are four things you can try to make your toilet work again:
1. Clean out the blocked vent.
If the vent is clogged, use needle-nose pliers to pull whatever is in there out. Use vinegar and baking soda to clear out your drain. Six cups of vinegar and one cup of baking soda go into the tank. After about 10 minutes of plunging, flush the toilet.
2. Clear the drain that is clogged.
Using a small amount of vinegar and baking soda, plunge the drain. After about 10 minutes, pour a half cup of baking soda and six cups of boiling water down the drain. If that doesn't work, you can use a snake to get rid of the clog.
3. Fix any plumbing leaks you find.
If your plumbing is leaking, a professional will need to fix it.
4. Get rid of any clogs in the pipe.
If something is stopping water from going into your tank, you can clear it out with a plunger. Pouring boiling water down the drain will help break up any clogs.
If your toilet fills slowly, hopefully, one of these solutions will help. If you need help, be sure to call a professional.
If none of these work, you might need to call a plumber. A toilet that takes a long time to fill up can waste a lot of water. You should be able to count on your toilet to flush well every time you use it.

Choose CBJ Plumbing Union City NJ if you need to fix or replace a toilet.
​

CBJ Plumbing Union City NJ can help you if you have problems like a toilet that takes a long time to fill. We know a lot about plumbing and are ready to take care of your needs. Call us at 201-875-1054 to get started right away!
0 Comments

Why A Shower Might Smell Bad

9/17/2022

0 Comments

 
Most of the time, taking a shower is a relaxing part of a person's day. You can't think of anything better than getting into the shower after a long, stressful day at work and letting the water wash away all your worries. But showers can also be very embarrassing. There are many different things that can make a shower smell bad.

Find out where the smell is coming from
​

When you notice a new smell coming from the shower drain that makes you wrinkle your nose in the bathroom, the first thing you should do is write down what kind of smell it is so you can figure out where it's coming from.

1. P-Trap Dry or Dirty?
If your shower drain smells like sewage, it means that your P-trap isn't doing its job and sewer gases are getting into your bathroom. If your P-trap is still clogged and there is a musty smell or a general smell, it probably needs to be cleaned.

What is a "P-Trap" in a shower, and how can it make a smell?
A P-trap is an extra drain fitting that comes with many bathrooms. This piece of plumbing, which is meant to keep sewer gases from coming back into your house through your drain system, is often the cause of smelly shower drains. The trap itself has water in it, which makes a seal that keeps the bad smells from coming back up into the house.

If there is no water in the P-trap or if it has dried out, smells can easily come up through the shower drain and land around your feet as you use the bathroom. This makes it easy to check because you can just shine a flashlight at it and see if it looks dry or wet.

How to Clean P-Traps in Showers
To clean out this part of the pipe, look around to see if there is any trash in the trap. If it looks like something is stuck inside, get an old cloth or paper towel and use it to scoop out whatever is in the way.

Once you've cleaned out the P-trap and made sure there's no trash in it, fill the bathroom sink tub with cold water and pour it into the P-trap until it's full and there are no air pockets. This can help get rid of any other blockages that might be causing the smell.

2. Leaky Pipes
If your shower smells like rotting eggs or sulfur, it's usually because there's a leak in the drain lines under your home. Some of the most common reasons why shower drains smell like this are broken valves, rusty pipes, and faucet joints that leak.

What can make pipes leak?
Leaks like these can make your shower smell the worst because they let sulfurous gases, which smell like rotten eggs, rise up through your drain system. Corroded pipes and loose joints, like those on your sink faucets or under your toilet seat, are common causes of a smelly shower drain.

How to Fix Pipes That Leak
To get rid of shower smells coming from your drain system because of leaking pipes, you'll need to tighten every corroded joint and replace sections of pipe that may be rusting away. This can be a hard job, but it has to be done to keep the bathroom a safe place to live.

3. Biofilm Buildup
If you can't use a plunger to clear a clogged drain, it's probably because biofilm has built up inside the bowl and is stopping water from draining. This is a common cause of smelly shower drains because when water doesn't flow through the pipes in the bathroom, everything starts to rot and decay more quickly, making smelly gases.

Biofilm is what?
Biofilm is a thin layer that builds up on the inside of drain pipes when hair and other debris start to break down. Dirt, dust, and other foreign objects can often stick together in your home's drain system to form a sticky layer that makes your shower drain smell.

Biofilm: How to Get Rid of It
Once you know where the smell is coming from in your house, you'll need to clean out all of the pipes under your bathroom sink and between these points. Because it's hard to get to, this part of the drain line is usually where people have trouble getting rid of tough clogs or smells.

You'll need a special enzyme-based product that kills bacteria and germs in general, as well as a few other tricks, to break down the biofilm. Some things that can make shower drains smelly is not keeping them clean, which can lead to buildup.

4. Clogged Drains
If hair or other things are getting stuck in your drain line, you'll need to fix it right away before the smell gets worse. Some of the most common reasons for smelly shower drains are clogged drains and leaks. When water sits under the house for too long, it starts to rot and break down much faster.

Why do shower drains get clogged?
Clogs in your shower drain are usually caused by too much use or overflow from the bathtub, but they can also be caused by dirt and other foreign objects that get stuck in your home's plumbing system. Drains often get clogged because there are many things that can easily cause them to do so, such as:

  1. Hair
  2. Dast
  3. Sand
  4. Small things
  5. Soap scum
  6. Dirt 
  7. Mineral Deposits

How to Unclog a Drain
To clear out a clogged drain, you'll need to take the face shield off your plunger so you can hold it better and then plunge it into the clog. Common reasons for a smelly shower drain can be hard to fix because you have to put one hand in the dirty p-trap and use the other hand to plunge, which is at best uncomfortable.

CBJ Plumbing Union City NJ is an expert in plumbing in your area.
​

If your shower smells bad, don't worry. We've got you covered. Call our team at 201-875-1054 right now. Our team of experts will be happy to help you and turn your shower back into a place where you can relax
0 Comments

How to Take Off a Drain Stopper

9/12/2022

0 Comments

 
A bathtub drain stopper is used to seal the drain and stop water from going down the drain. It often gets stuck, which makes it hard to turn the faucet on and off. If you decide to take off the drain stopper at this point, you'll be able to see the problem more clearly. It's also important to know how to take off your drain stopper in case it's not in the right place. If your stopper doesn't cover the bottom of the tub completely when it's in place, it might not keep the water in very well, which would make taking a bath a pain.
The first step in figuring out how to take off a drain stopper is figuring out which kind you will need to fix the problem. In the article below, you can read about the most common kinds of drain stoppers for bathtubs.

Stopper for push/pull
​

This type of stopper has a rod on the side that you can push and pull. At one end of this rod is a round handle, and at the other end is a hole that your finger can fit into. The push-pull mechanism is connected to a plunger that goes down into the drain to stop the flow of water. Here's how to take off a tub stopper with a push-pull mechanism:
  1. Take the knob off the top of the stopper. Take the lid and knob off by hand. Move the knob with one hand until it comes off.
  2. Is the knob too tight to turn by hand? Grab a towel and carefully wrap it around the object. Then, use regular pliers to pull it free.
  3. After it has been taken apart, look for the exact point where the strainer's crossbar meets the stopper. Use a flathead screwdriver to take the pot off of the strainer.

Toe-Touch Stopper for Tub
​

Toe-touch tub stoppers look like pliers and can be used to open the drain by being pulled up. When you push it down, the handle comes off and the stopper closes off both drains in your bathtub. How do you take off a toe-touch tub stopper?
  1. Turn a screwdriver or a pair of tongs around one end of the plunger rod that sticks out from under the rubber top. Use your tools to pry up on this rod until it moves out of its place.
  2. After you take the plunger out, pull up on the rubber top to take it off its base. You should now be able to open your strainer by turning the head of it clockwise with your hands.
  3. Once the head is unscrewed, it can be taken off by pulling it up and away from the stopper.
  4. Grab this type of stopper's knob, which is on top of the bathtub drain, with your hands. Carefully pull up on the stopper until it comes off its base.

Tub Stopper You Can Lift and Turn

The lift and turn tub stopper is held in place by two screws. How do you take this kind of stopper off a bathtub drain?
  1. When the stopper is in the "open" position, you should put one hand on top of the body to hold it in place.
  2. Take the stopper off the strainer and slowly turn the knob the other way to look for a screw set on the knob. If you can't find one, turn the stopper counterclockwise until it can be removed from the strainer.
  3. Sometimes the threads are taken out, which makes it impossible to take off. Try slowly turning it up and pulling it up.
  4. If your stopper doesn't have a screw on the handle but still won't come off, lift it up and turn it until you find a small screw.
  5. You can loosen the screw with a screwdriver or a wrench. Don't take the screws out all the way to get the stopper off. When using this method, you need to be very careful because the screw can easily fall down the drain if it is fully removed.
  6. If neither the stopper nor the knob has a set screw, it's probably a channel-and-pin mechanism.
  7. Take the stopper out of the channel and slowly turn it the other way until the slot on the bottom part lines up with the pin on the top part.
  8. To open it, move the stopper up and down.

Other Stoppers for Tubs

One screw holds a flip-it® tub stopper to the bottom of the overflow plate. Most of the time, this kind of tub stopper is easy to take off. To take off the stopper, grab it by its body and twist it up and down (try all directions) until it comes off.

What to do next after the process is done
​

Once you get the bathtub drain plug off, use a flashlight to look down the drain. If it takes a long time for your bathtub to drain, there may be a buildup of soap scum, hair, and other things that are blocking the drain. If the blockage isn't too deep, you can try to take the strainer off and free it yourself, if you're brave enough. But you can avoid all that mess by calling CBJ Plumbing Union City NJ to take care of your bathtub.

Reach Out to Our Team Today

Let us help you if you're trying to take off a bathtub drain stopper. Call us at 201-875-1054 to talk to a member of our team right now. Our team of experts will be more than happy to help you get your bathtub back in shape.
0 Comments

Sugerencias rĂ¡pidas para arreglar un grifo con fugas

7/7/2022

0 Comments

 
Picture

​Cuando un grifo gotea, generalmente es una indicación de que uno de los componentes se ha desgastado. La forma en que debe continuar estará determinada por la ubicación de la fuga y el diseño mecánico de su grifo. Hay cuatro tipos distintos de grifos disponibles para usted: compresión, disco, cartucho y mecanismo. Cada uno tiene sus propias ventajas únicas.


Antes incluso de intentar reparar un grifo que gotea, primero debe identificar el tipo de grifo que tiene para saber cómo comenzar con el proceso de reparación. Antes de comenzar, necesitará los siguientes elementos de equipo:

Si tiene un grifo más ancho, las válvulas a menudo estarán cubiertas con cubiertas estéticamente agradables. Debido a que a menudo hay una rosca delgada en el conjunto de la válvula, debe intentar quitar la pieza de moldura. Debajo de la base de cada pomo hay un tornillo que sirve para sujetar el mango al vástago. Al desenroscar el componente, el mango se quitará con cuidado. Hay ocasiones en las que cuesta despegar el mango del grifo del vástago. Aplicar WD-40 en el área con una botella rociadora lo ayudará a agarrarlo mejor.

Cuando haya terminado de quitar la tuerca del empaque, debería poder ver el vástago. Realmente necesitas deshacerte de toda esta área. En este punto, las rutas para ir a los numerosos grifos se bifurcarán en diferentes direcciones. Por ejemplo, algunos vástagos se pueden quitar rompiéndolos, mientras que otros se pueden quitar girándolos para alejarlos de la válvula. Retire todo con cuidado. Debe tomar precauciones para evitar la posibilidad de dañar los componentes, ya que esto podría hacer que el problema con el grifo que gotea sea mucho más grave.

Los grifos que tienen menos de 25 años suelen tener un cartucho en su diseño. Después de 25 años de encendidos y apagados, los asientos seguramente han perdido su utilidad. Con un par de alicates de bloqueo de canal, debe intentar retirar el cartucho de inmediato. Puede ser difícil quitar los cartuchos si se han desarrollado incrustaciones y los han cementado en su lugar después de haber estado en su lugar durante algún tiempo. Si tira del cartucho mientras aplica una pequeña cantidad de presión, debería poder liberarlo eventualmente. En caso de que no pueda retirar el objeto, debe llamar a un plomero. Existen instrumentos que se pueden utilizar para extraer cartuchos.

Herramientas para el trabajo

Debe tener a mano todas las herramientas necesarias para ahorrar tiempo. Idealmente, necesitarás:


  • Un vicio o agarre en la mesa
  • Aceite para un destornillador de silicona.
  • Pinzas o llave inglesa, pequeña
  • Idealmente, una junta tórica nueva, de una fuente acreditada de juntas tóricas.

En este punto, todo debería permanecer en su ubicación actual. Compruebe la arandela y la junta tórica que se encuentran dentro del asiento de la válvula. Las fugas son a menudo la consecuencia de daños en este componente o el comienzo del deterioro del sello. La nueva arandela reemplazará a la anterior cuando se retire la anterior para que pueda ser reemplazada.

Además, debe reemplazar la junta tórica, ya que es propensa al deterioro y debe hacerse con tanta frecuencia. Primero, debe verificar que tenga el ajuste correcto y luego, si es necesario, debe reemplazar las juntas tóricas y las arandelas. Si no está seguro acerca de alguna de estas cosas, examine el asiento para ver si los lados encajarán o no con la arandela plana. Es posible que tengas que salir y comprar un tamaño diferente.

Las personas que tienen problemas para obtener la junta tórica del tamaño adecuado deben llevar la junta tórica que tienen con ellos a una ferretería para garantizar un ajuste preciso. Si tiene alguna duda al respecto, debe revisar el asiento para ver si los lados coinciden correctamente con la forma del cono. Una vez que esté completo, podrá comprar la junta tórica adecuada. En lugar de llevar una junta tórica vieja a la ferretería, puede ahorrar tiempo y dinero comprando una variedad de juntas tóricas en una variedad de tamaños a la vez. Incluso si cuesta unos pocos dólares más, tener el tamaño correcto es algo que resultará beneficioso.

Una vez que tenga todos los componentes, deberá volver a armarlos. A la hora de volver a montarlo se van a realizar estos procedimientos en ese orden:

Sugerencias y respuestas a problemas útiles

Después de desmontar el grifo y volver a montarlo, debe asegurarse de que no pierda agua cuando esté abierto. Si ocurre, el problema puede no ser solo una junta tórica rota, sino algo mucho más serio. La mayoría de las veces, la siguiente razón más probable es la corrosión en el asiento de la válvula.

Esto sucede cuando no se limpia adecuadamente de manera regular y eventualmente se desarrolla una fuga más cerca del pico del grifo. En el caso de que esto no ayude a detener la fuga de su grifo, aún existen otros problemas que podrían ser la causa, como componentes sueltos, sellos desgastados o tuberías rotas. Si ha probado estas cosas y no han tenido éxito, puede ser hora de llamar a los peces gordos y ponerse en contacto con un plomero.

Uniendo Todo

En caso de que esto ocurra, para cerrar el suministro de agua en su casa, deberá ubicar el punto de entrada del suministro de agua a su propiedad. Es esencial tener en cuenta que si cierra la válvula de agua, toda la casa comenzará a pedir agua instantáneamente. Esto es algo que debes tener en cuenta en todo momento. Pero a menudo es necesario tenerlo a mano para llevar a cabo cualquier mantenimiento o reparación esencial.
0 Comments

Quick Suggestions to Fix a Leaking Faucet

6/28/2022

0 Comments

 
Picture
When a faucet leaks, it's usually an indication that one of the component parts has been worn out. The manner in which you should continue will be determined by the location of the leak as well as the mechanical design of your faucet. There are four distinct types of faucets available to you: compression, disc, cartridge, and mechanism. Each has its own unique advantages.

Before you even attempt to fix a leaky faucet, you need first to identify the kind of faucet you have so you know how to begin with the repair process. Before getting started, you will need the following items of equipment:

If you have a broader faucet, the valves will often be covered with aesthetically pleasing covers. Because there is often a thin thread on the valve assembly, you should attempt to remove the trim piece. Under the base of each knob is a screw that serves to attach the handle to the stem. Unscrewing the component will result in the handle being carefully removed. There are occasions when it is difficult to detach the handle of the faucet from the stem. Applying WD-40 to the area using a spray bottle will help you get a better grip on it.

When you have finished removing the packing nut, you should be able to see the stem. You really need to get rid of this whole area. At this point, the routes to go to the numerous faucets will branch off in different directions. For instance, some stems may be removed by snapping them off, while others can be removed by twisting them away from the valve. Remove everything in a careful manner. You should take precautions to prevent the possibility of causing harm to the components, as this might make the problem with the leaky faucet much more severe.

Faucets that are less than 25 years old often have a cartridge in their design. After 25 years of being turned on and off, the seats have most certainly lost their usefulness. Using a pair of channel lock pliers, you should make an immediate attempt to remove the cartridge. It may be difficult to remove the cartridges if the scale has developed and cemented them in place after they have been in place for some time. If you pull on the cartridge while applying a small amount of pressure, you should be able to eventually liberate it. In the event that you are unable to remove the object, you should call a plumber. There are instruments that may be used in order to remove cartridges.

Tools for the job
You must have all the necessary tools on hand in order to save time. Ideally, you'll need:

  • An on-table vice or grip
  • Oil for a screwdriver made of silicone
  • Pick pliers or wrench, small
  • a fresh o ring ideally, from a reputable source of o rings.

At this point, everything should remain in its current location. Check out the washer as well as the O-ring that are both situated within the valve seat. Leaks are often the consequence of damage to this component or the beginning of the seal's deterioration. The new washer will replace the older one when the older one is removed so that it may be replaced.

Additionally, you need to replace the O-ring since it is prone to deterioration and should be done so often. First, you should verify that it has the correct fit, and then, if required, you should replace the O-rings and washers. If you are unsure about any of these things, examine the seat to see whether or not the sides will fit with the flat washer. It's possible that you'll need to go out and buy a different size.

People who are having problems obtaining the appropriate sized O-ring should instead take the O-ring they have with them to a hardware store in order to ensure a precise fit. If you have any doubts about this, you should check the seat to see if the sides match the cone shape properly. Once that is complete, you will be able to buy the appropriate O-ring. Instead of taking an old O-ring with you to the hardware store, you could save time and money by purchasing an assortment of O-rings in a variety of sizes all at once. Even if it costs a few dollars extra, having the correct size is something that will prove to be beneficial.

Once you have all of the components, you will need to put them back together. When putting it back together, these procedures are going to be carried out in that order:

Suggestions and Answers to Helpful Problems

After taking apart your faucet and reassembling it, you need to make sure that it does not leak any water when it is turned on. If it occurs, the problem may not only be a broken O-ring but something far more serious. Most of the time, the next most probable reason is corrosion on the valve seat.

This happens when it is not cleaned properly on a regular basis and eventually develops a leak closer to the spout of the faucet. In the event that this does not help to stop the leak from your faucet, there are still further problems that might be the cause, such as loose components, worn-out seals, or broken pipes. If you have tried these things and they have not been successful, it may be time to call in the big guns and get in touch with a plumber.

Bringing Together Everything

In the event that this does occur, in order to turn off the water supply in your house, you will need to locate the point of entry for the water supply into your property. It is essential to keep in mind that if you turn off the water valve, the whole house will instantly start calling for water. This is something you should keep in mind at all times. But having it on hand is often required in order to carry out any essential maintenance or repairs.
0 Comments
Forward>>

    Author

    Write something about yourself. No need to be fancy, just an overview.

    Archives

    December 2022
    November 2022
    October 2022
    September 2022
    July 2022
    June 2022

    Categories

    All
    DIYs
    Español
    Faucet
    Tips
    Tips & Advice

    RSS Feed

Picture
FOR A FAST AND QUALITY PLUMBING SERVICE IN UNION CITY NJ, CALL  (201) 875-1054


Home                       Service                        About Us                        Contact Us
Picture

CBJ Plumbers Union City
4015-A Hudson Ave
Union City, NJ  07087

(201) 875-1054
FIND US ON:

call us now!
Website by Design Rush